It is so important that you use the right paint if you have lime plaster walls, and we can help guide you for what you need, how to do it, and how to improve your overall indoor air quality. If you are new to lime plasters and want to know the difference between lime plasters and gypsum standard plasters please click here.
When you have lime based plasters, you need to choose a paint that is actually breathable, not just ‘greenwashed’ breathable that you see on almost all plastic paints these days also. Plastic paints are not breathable, not even slightly. Lime plasters need to be able to breathe, so it is important that you have a tested breathable paint for lime plaster, whether it is a natural mineral based paint (that is suitable for painting over lime) or a true (made from lime) breathable lime paint.
If you want something to replace a limewash, then use Graphenstone Biosphere. The easiest paint to use, with most colours is Graphenstone Grafclean, which can be used in the rest of the house over normal plaster / normal paint as well as lime plasters / lime paints.
We stock a few different types of breathable paint for lime plasters, which I will discuss further below.
| Base | Suitable for Lime | Over ‘normal’ paint? | Washable | Colours | Link | |
| Graphenstone Grafclean Interior (Matt) | Mineral | YES | YES | YES | Full Range | BUY |
| Graphenstone Grafclean Exterior (Matt) | Mineral | YES | YES | YES | Most of range | BUY |
| Graphenstone Grafclean Eggshell (Int & Ext) | Mineral | YES | YES | YES | Full Range | BUY |
| Graphenstone Ecosphere (Interior) | Lime | YES | With primer | NO | White / Off Whites | BUY |
| Graphenstone Biosphere (Exterior) | Lime | YES | With primer | NO | White / Off Whites | BUY |
| Graphenstone GCS Interior | Mineral | YES | With primer | NO | Most of range | BUY |
| Graphenstone GCS Exterior | Mineral | YES | With primer | NO | Most of range | BUY |
| Auro 344 Lime Paint (Int & Ext) | Lime | YES | NO | White only | BUY |
Buy Breathable Paints for Lime Plasters
-
Product on sale
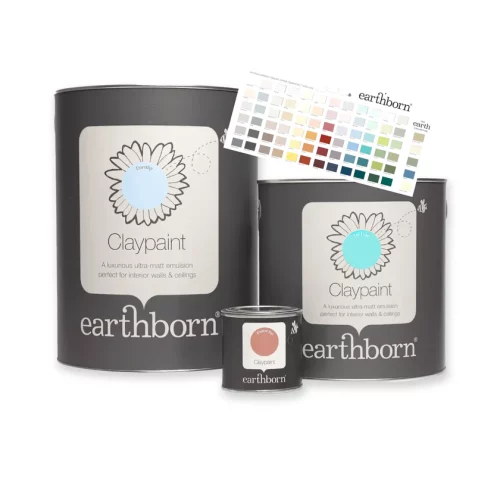 Earthborn Clay Paint – Breathable Ultra MattPrice range: £2.00 through £96.00 Inc VAT
 -
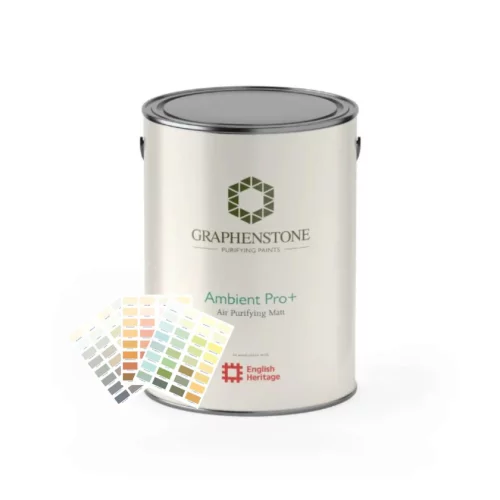 Air purifying Wall Paint for Interior & Exterior – Graphenstone Ambient ProPrice range: £36.00 through £299.00 Inc VAT
 -
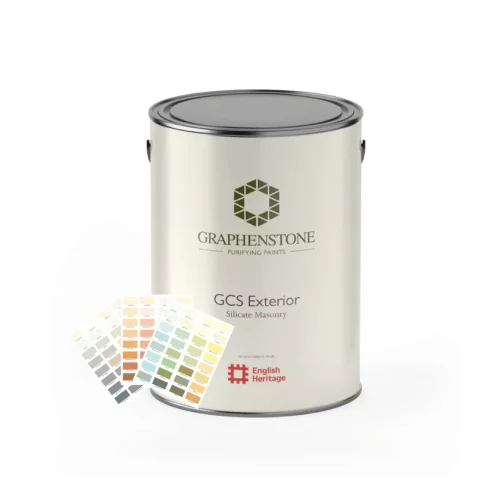 Heritage Exterior Natural Wall Paint – Graphenstone GCSPrice range: £8.50 through £289.00 Inc VAT
 -
 Heritage Interior Natural Wall Paint – Graphenstone GCSPrice range: £8.50 through £249.00 Inc VAT
 -
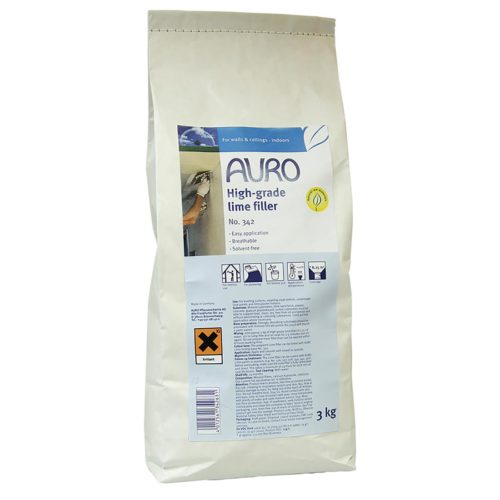 Natural Lime Filler – High Grade Lime Filler – Auro 342Price range: £47.00 through £165.00 Inc VAT
 -
 Lime Paint – White High Grade Eco & Natural Breathable Lime Paint – Auro 344Price range: £65.00 through £120.00 Inc VAT
 -
 Natural Chalk Paint – Lime & Mineral Interior Wall Paint Auro 326Price range: £6.00 through £85.00 Inc VAT
Table of Contents
- Lime plasters need vapour permeable paints
- SD value explained for breathable paints
- Can I use any type of paint for lime plaster?
- Painting New Plaster – How do I paint on new plaster?
- Common Questions about painting on lime plaster
Lime plasters need vapour permeable paints
Lime plasters need vapour permeable paints which allow moisture to easily pass through without becoming trapped behind surfaces of impermeability, such as a modern plastic paint or damp barrier, or even plastic insulation.
SD value for breathable paints
Breathable paints are measured by an index of SD value, for instance an SD (steam diffusion) value of 0.01 – 0.05 shows that the moisture needs to travel 1-5 cm to escape.
An SD value of 1 means that vapour needs to travel 1 meter to escape the surface, so 100 times further than a paint with the value of 0.01. If you don’t see the SD value of the paint you are looking at, avoid.
There is currently no regulation for the word ‘breathable’ in relation to paints, so be cautious. More on breathable paints here.
Can I use any type of paint for lime plaster?
Most paint found at your local store just won’t be suitable for lime plasters. ‘Normal paints’ contain plastics and chemicals, which form an impermeable layer that water vapour just can’t get through. Avoid at all costs.
There are lots of paints available for both lime, gypsum and other types of walls, but the difference is not only the composition, IE which chemicals, binders, minerals they contain, but also the breathability. There is a lot of greenwashing around breathability, so in doubt always check the SD value for each paint (lower than 1 is essential)
There are many types of paints made for older houses, lime plasters and older substrates, and the common paints you will come across are
Lime Paints: Lime based, breathable and suitable for lime plasters.
Clay Paints: Both chemical based and natural versions exists, be careful of greenwashing. Usually very flat matt finish. Usually fairly durable.
Distemper: Very old fashioned paint dating back many years, which is a natural mix of chalk, pigment, water with a natural binder such as animal glue.
Mineral paints: Modern natural style paints, containing a mineral base and generally strong and tough. Many types are available, with and without chemicals.
Limewash – Built up of thin coats of lime and water, acting as a sacrificial layer to protect friable brickwork. Great option, but more care and time needed. Read more about limewash here.
Painting New Plaster – How do I paint on new plaster?
If you’ve just had a room plastered and you’re itching to start painting, then read on. This handy guide to painting new plaster will help you avoid the pitfalls and get the immaculate finish you want.
First off, let’s deal with a myth. Many people believe that applying a layer of diluted PVA glue to seal the ‘plaster’ is a must, but professional plasterers and decorators agree that this is a waste of time. It can even lead to a poor paint finish if there are any lumps or inconsistencies in the PVA. We follow the professionals in recommending that you apply our paints directly to the plaster wall. Many conventional and most breathable paints and natural and / or organic paints need to have a first special first layer applied called a ‘mist coat,’ made up of paint diluted with water. This helps the top coat to bind with the plaster, but it’s time consuming and messy.
Common Questions about painting on lime plaster
For most normal painting jobs, where you just need a quality easy to use house paint, that works as well as a modern acrylic, we have a few options for you – but by far the easiest (and top selling) is to use this natural paint here. Available in great colours, tough and washable. Once the plaster has properly dried (usually about 4 weeks) then water thin the paint with around 20% water, and use this as the ‘mist coat’ – this will enable good absorption and adherence to the plaster. After 2-4hours, then you can paint the first of your 2 coats of top coat. Again, just use the same paint – this natural paint Graphenstone Premium would be a great choice.
When choosing a paint for lime plaster breathability is the key. Just one square yard of 5mm-thick lime plaster can contain up to half a litre of water. It can take over six months for the plaster to fully dry, but, if your paint is porous and breathable such as Graphenstone Ecosphere then you can paint much earlier, as the water vapour isn’t sealed in. Have a look at our natural lime paint range for more options. You can still use the Graphenstone Premium over lime, and have access to brighter colours. With all our paints, water thin by 20% to act as the mist coat onto bare plaster.
If you’re painting lime plaster, it’s once again the best choice, as it is both fully breathable and emission-free, meaning there’s no risk of a reaction between the chemicals in the paint and the drying plaster. Once you’ve chosen your paint, make sure you pick the right tools for the job. Since new plaster is a smooth, low-friction surface, a cheap or dilapidated roller can slip and cause an uneven finish. As you’re applying the first coat, you may notice slight blemishes or bumps which weren’t apparent on the raw plaster. If you do find any unsightly ridges or lumps, don’t panic. These can be sanded down with fine sandpaper (make sure you wrap the sandpaper round a plane surface to ensure you get a flush finish), and immediately painted over. If you find any gaps or recesses, these can be filled with wall filler, sanded, then touched up with paint.
No, just water thin the top coat, such as Graphenstone grafclean by 20% – and use this as the mist coat. Once this has dried, then you can use the top emulsion coat as normal.
As above, no, just water thin the top coat, such as Graphenstone grafclean by 20% – and use this as the mist coat. Once this has dried, then you can use the top emulsion coat as normal.
Ideally we suggest using a lime paint over a lime plaster, but to be honest the Graphenstone Grafclean (mineral based) is also very good.
So there you have it: If you’re planning on painting over new plaster, don’t PVA, make sure you save yourself time and effort by using a paint which doesn’t need this solution, and make sure you have the right tools for the job.
Yes! You can paint UPVC doors, just be aware of the limitations of painting mineral paints on shiny plastic. Although you can paint them – it is hard to do a good job (generally painting on plastic), so please be aware of this before you start. You may find that spraying the door gives a better finish than a brush.
The ideal way of painting these doors in order to get a smooth surface would be with a spray gun after you remove the doors. This, however, is an extremely lengthy process and requires specialist tools, so it is still possible to use a brush.
Clean the surface of the door to get rid of any dust particles or grease that could compromise the attachment of paint on the surface. After cleaning the door, give it a key sand and brush off the dust before applying the primer. Using sandpaper will create a smooth surface for the primer to stick to.
Use this universal primer to create a surface that will allow the paint to adhere. Using your paint brush apply the first coat of the primer and wait for it to dry. You might require an additional layer of primer depending on the condition of your upvc door.
Before you start painting with this natural multi surface paint, use a good quality brush that won’t leave behind any brush hairs. You will have brush marks, you can’t avoid that if you are painting a upvc door but you can avoid brush hairs stuck in the paint. Once you are done painting, put boxes in front of the door or any other hurdle that will prevent kids or pets from leaving marks on the door. This paint has a quick drying time and will dry in a couple of hours, and will require at least one more coat.
Try a small area first if you are worried about it!
Painting a room is an easy and engaging activity if you have the right tools and instructions. This is one of those activities that can be a form of family bonding, stress release and a way for you to put your creativity to good use. When it comes to painting a room, safety is important too and that is why we recommend using a non-toxic paint which is environment friendly and free from toxic chemicals.
Here is a step by step guide of how you can paint your room without any hassle:
What should I do first when painting a room? The very first step in painting a room is planning how it should be done. You are not going to just pick up a brush and start painting all the walls. Colour shades, placement and contrasts etc should be kept in mind.
The next step is to select the shade of colour and paint. While selecting the shade another thing that should be kept in mind is that the paint should be environment friendly and non-toxic depending on the usage of the room. For this purpose, one of these natural paints are one of the best selections available.
For every painting project different tools are required depending upon the requirements of the room. Some of the tools that are required for every project are as follows:
– Paint (Such as this natural paint)
– Paint brush
– Paint roller
– Paint roller extension rod
– Paint tray
– Putty knife
– Sand paper
– Primer (If needed)
– Drop cloth
– Painter’s tape
Empty the room before you start painting. Move out all the furniture or move it to the centre of the room and cover it with a drop cloth. Use tarps and drop cloth to cover the floors. Use painter’s tape to cover door knobs, windowsills and the ceiling perimeter. Remove drapes from the windows and other decoration pieces in the room. The next step is to clean the walls from dirt and debris because paint would not adhere strongly to the walls if they are unclean. Similarly, if walls have cracks or holes then they need to be repaired with a natural wall plaster such as this. Once it dries, sand it with fine sandpaper.
Primer is designed to supply a stable surface on which subsequent layers of paint can strongly adhere. In addition to this, primer can also help to hide the stains. In case of the surface being porous, the paint gets absorbed into the pores, so more layers of paint are required before it can develop a protective coating
Similarly, if the surface is too glossy, colour coat adhesion is difficult because the paint cannot lock onto the surface. Primer helps with that situation too.
If you are using GrafClean paint then to prepare the primer layer, add 10% water to the paint to make a thinned paint mixture. Apply one coat of the primer to the walls and the ceiling using a paint brush or roller and let it dry completely.
Now it is time to paint the room, first start with the ceiling and then the walls. Pour the GrafClean Premium paint onto the paint tray and coat the roller properly with paint. Now start painting the walls by using the roller. It should be painted widthwise in 6ft square sections. Move from left to right, spreading the paint evenly in horizontal strokes. While moving from one square to another, make sure to feather or roll lightly at the edges of the square so that the layers do not overlap.This helps to ensure even coverage. Once you are done with the ceiling, apply the same method to the walls. Roll on the walls in vertical squares. To prevent paint from drying unevenly, try to not stop in the middle of the process. Touch up any missed spots while the paint is still wet to ensure even sheen.
Let the first coat dry for at least 2 to 4 hours. Afterwards start painting a second coat for better finish repeating the same process as for the first coat. The longer you let the first coat dry, the better your results will be.
After you are done with painting your room, it is time to clean up after yourselves. Clean up all the supplies, paint brushes, rollers and paint tray and store them at a dry place. Remove the tarps and drop clothes from the floor and furniture. Remove painter’s tape from door hinges and windowsills at a 45 degrees angle to avoid removing any fresh paint.
Painting a room on your own especially if it is your first time can be challenging but with this step by step guide, you can paint any room with ease and thoroughly enjoy the process. While following all of these steps it is always advised to use protective gear like gloves or masks if you have allergies or are asthmatic however now there is a range of non-toxic and environmentally friendly paints available that pose very low threat to health.
Cutting in paint is done for designing purposes or to make the paint aesthetically pleasing. This way a straight line is cut between two colours using a paintbrush. The technique looks very difficult but it needs practice and a little patience. Cutting is normally done on ceilings to separate the two walls. A straight line is drawn of paint. If you are a beginner then read the following tips to make the process less stressful and get a straight line!
First, pour some paint in a separate container, so that you don’t get too much paint on your paint brush if you dip the brush in the whole container. It will create more space, make the process easier and less messy for you. Cover the room with cloth so the paint won’t mess up the floors, apply masking tape to areas that are difficult to reach and there is a high chance that you won’t be able to get a straight line.
Insert about an inch of the brush inside the paint container and gently pat the brush on the side of the container. This will allow you to paint more surface before dipping the brush again.
If there is a difficult corner that you need to paint, twist your brush a little so that it adjusts, painting that area. Don’t twist it a lot, that will make it messy.
To make a straight line, you need to be in front of that part of the wall and with bright light. This will help you see clearly how long the line will be. Start painting a straight line keeping your gaze focussed. After approximately 12 inches straight line, turn your brush to a 90 degree angle and paint on that same track again some even strokes. When you see that you have a straight line, paint an even stroke at the same part again but this time keep your brush in a horizontal position. This will clear any paint brush marks.
Using the same technique, continue painting around the room keeping the edges wet where the sections are overlapping. If there are accidental drips, don’t worry and take a damp cloth and cover a spackling knife with this cloth. In a horizontal position, remove the paint drips on the floor or any edges that you have messed up. Throughout the process, keep a light brush as too much strength will make more paint to ooze out.
We advise to use trim tape or masking tape to make a nice edge against your wood and trim.
Always use a good quality brush (and take care of it!)
Stairs are an important point in a house, and are often one of the most used places! Therefore they need to be well painted and durable so that the whole house looks clean and organised. Refreshing stairs with new paints is an excellent way of bringing your old stairs back to life. This investment, if done right, will be great for a long period of time. Most of the time, stairs are either carpeted or are made of wood. If your stairs are made of wood or any other wood-material, then it is advised to paint both treads and risers.
You will need the following to be able to paint your stairs:
– Masking tape
– Paint roller
– Paint brush
– Sand paper
– Natural Wood Paint (such as this natural paint)
– Primer (such as this natural primer)
If the stairs have carpet then remove it, clean the surface for there may be rough areas that may need sanding. Once the surface is clean and even, move on to the next step. Prepare yourself too by wearing protective eye glasses aur gloves.
This universal primer is suitable for wood, helping the upper coatings to stick to the base perfectly. It is an excellent primer for metal services as well, preventing them from corroding. Take sufficient primer on a paint brush and start applying the primer on the steps. It will help you if you start applying from the top stairs. This primer is ideal for both indoor and outdoors.
This natural wood paint, Grafclean mid sheen, is the perfect paint for stairs as it will adhere to the base created. It has a thick covering and simultaneously allows the paint to breathe as well. It can directly be applied to the wooden steps, it won’t create any toxic fumes since it has very low VOCs. Usually a foam roller is used to coat the wide surfaces, but you can also use a paint brush. Make sure that there are no drips while applying the coats.
The next coats can be applied the same way making sure that each applied layer is not too thick. Two to three thin layers add up to give a smooth and beautiful look rather than a single thick coating. This will take approximately a day to dry off, make sure nobody uses the stairs until then. If you applied any decorator’s tape in the beginning to keep the floor and walls safe then this is the time when you remove that tape as well. After removing the tapes, clean the area thoroughly. You will have a brand new staircase in about two days which will make your hallway look as if it is brand new!
Painting radiators sounds easy but there are some helpful tips and tricks that will make the whole procedure come together neatly, giving your room a new look. Make sure that before you begin, the radiator is turned off and cold. Place some sheets on the floor to help you with the cleaning up later.
Sanding the radiator will help you clean off any leftover debris or dirt. This is a very important part as paint adhesion on the radiator depends on the surface of your radiator. Most of the debris prevents this adhesion and eliminates chances of getting a neat finish.
Primer is a solid base for the paint which will make sure that the coatings firmly adhere to the surface of the radiator. This universal primer acts as that strong base, bonding your mineral paint to the surface set. It helps in reducing stains from the top coat and can be applied to a variety of surfaces. You can use an angled brush to reach the difficult corners of the radiator if a straight brush is not doing the job properly. Before moving on to the next step, give the primer enough time to completely dry off before you start applying coats.
After the primer has dried, apply the first coat making sure that the room is well ventilated. This great top coat uses an impressive graphene technology to give a neat coating over surfaces. This paint is made with vegetable resin so that the paint could be applied to exterior and interior surfaces. It has no VOC, so no toxic fumes in the air. The texture after the paint dried out is smooth with an attractive finish. The coverage that this paint provides over surfaces, radiators in this case, is excellent owing to the 70% solid content. Grafclean mid sheen paint has a resistance to moisture, and lets the paint to breathe. In conclusion, the paint will stay on for a longer time and maintains the look of the paint. You can also clean the radiator later to remove any stain, as this paint is washable. This won’t create cracks in the paint for a long time, Grafclean mid sheen paints are super flexible in that matter.
We suggest using the Graphenstone Universal primer for priming of radiators
https://www.organicnaturalpaint.co.uk/shop/natural-paint-universal-primer-four2four-premium/
We suggesting using the Graphenstone Midshine for painting radiators, but be aware of the top temperature of your radiators:
https://www.organicnaturalpaint.co.uk/shop/natural-wood-paint-interior-exterior-grafclean-midsheen/
How to paint a wall. Painting may seem like an easy task and it is to a certain extent but if you’re not careful then it can get messy and the wall may not get painted properly. In addition to this, personal safety is also important since paints can contain some toxic constituents and that is why we recommend non-toxic, environmentally friendly paints like these to paint your rooms.
Here is a simple guide to painting a wall whether it is inside or outside the house. This will help ensure that you have the proper tools and things don’t get messy.
Planning your approach before you start painting
The first step to painting a wall is planning your approach. You are not going to just pick up a brush and start painting. You need to plan your approach based on whether the wall is inside or outside the house and the variables this changes. Moreover, color, shades and contrasts with the surrounding should also be kept in mind.
Selecting the colour
Keep in mind the contrast or color the other walls and the surroundings.
Picking out the tools
For every painting project different tools are needed depending on the requirements of the wall. Some important tools needed for every painting project are as follows:
- Paint (Try these natural modern wall paint)
- Paint brush
- Paint roller
- Paint roller extension rod
- Paint tray
- Putty knife
- Sand paper
- Primer (Natural primers can be found here)
- Drop cloth
- Painter’s tape
Prepping the wall
Empty the room before you start painting.. Use tarps and drop cloth to cover the floors. Use painter’s tape to cover door knobs, windowsills and the ceiling perimeter. Remove drapes from the windows and other decoration pieces in the room. If the wall is outside the house then remove any decorations on the wall.
The next step is to clean the walls from dirt and debris because paint would not adhere strongly to the walls if they are unclean. Similarly if walls have cracks or holes then they need to be repaired with acrylic caulk and a putty knife. Once it dries, sand it with fine sandpaper.
Similarly for walls outside the house, pressure wash the wall to remove dirt and debris. Repair all the damaged surfaces on the wall, remove all the loose paints. Cover all the doors, windows and lights using drop cloth or tarp before starting.
Another important thing is to remove mold from the walls before staring since painting over a mould can amplify the problem.
Applying primer
Primer is designed to supply a stable surface on which subsequent layers of paint can strongly adhere. In addition to this, primer can also help to hide the stains. In case of the surface being porous, the paint gets absorbed into the pores, so more layers of paint are required before it can develop a protective coating
Similarly if the surface is too glossy, color coat adhesion is difficult because the paint cannot lock onto the surface. Primer helps with that situation too.
If you are using Graf Clean paint then to prepare the primer layer, add 10% water to the paint to make a thinned paint mixture. Apply one coat of the primer to the walls and the ceiling using a paint brush or roller and let it dry completely.
Painting the first coat
Now it is time to paint the wall. Pour the Graf Clean Premium paint onto the paint tray and coat the roller properly with paint. Now start painting the walls by using the roller.
In case of a ceiling, it should be painted widthwise in 6ft square sections. Move from left to right, spreading the paint evenly in horizontal strokes. While moving from one square to another, make sure to feather or roll lightly at the edges of the square so that the layers do not overlap. This helps to ensure even coverage. Once you are done with the ceiling, apply the same method to the walls. Roll on the walls in vertical squares.
To prevent paint from drying unevenly, try to not stop in the middle of the process. Touch up any missed spots while the paint is still wet to ensure even sheen.
In case of an outside wall, fill the paint sprayer with exterior paint and then start coating the wall. Depending on the hue, apply one to two coats of wall. Work your way from top of the wall to the bottom in a smooth controlled manner, overlapping each stroke by 8 inches.
Apply wall brushwork
Now after rolling, use brush dipped in paint to do brushwork in areas that cannot be reached by rollers. This includes the edges and corners of the walls and edges between walls and the ceilings, the area around hinges and near the molds.
Painting the second coat
Let the first coat dry for at least 2 to 4 hours. Afterwards start painting a second coat for better finish repeating the same process as for the first coat. The longer you let the first coat dry, the better your results will be.
Cleaning up after yourself!
After you are done with painting your wall, it is time to clean up after yourselves. Clean up all the supplies, paint brushes, rollers and paint tray and store them at a dry place. Remove the tarps and drop clothes from the floor and furniture. Remove painter’s tape from door hinges and windowsills at a 45 degree angle to avoid removing any fresh paint.
How to paint kitchen cupboards: Painting Kitchen cupboards is a tricky job even for people who have done it before!
Kitchen cupboards need fresh paint every few years to give them a new look and keep them looking great. This is the easiest and probably the cheapest way of giving your kitchen a new look. However, you need to give a lot of attention to some details before starting it or else you might end up ruining your cupboards.
To avoid potential blunders in doing so, we have some tips and tricks to cover those cupboards in beautiful, even layers of paints. We have also mentioned some common mistakes that you need to look out for.
I suggest using a coat of a universal natural primer, and then two coats of a natural wood paint such as this. This will give you great results, with a gorgeous 10-13% sheen. Have a look at this range of natural kitchen paints.
Prepping kitchen cupboards before painting:
Cleaning the wood before painting the cupboards:
If your cabinets are made of wood then there are chances that the old paint is stuck there along with oil and grease. A scrub is needed before you begin the painting process, as clean cabinets will let the new paint stick to them and last for a much longer time, otherwise the paint will come off within a few months leaving you with uneven patches of the new paint.
Take out the cupboard drawers and hinges before painting
You might have heard someone recommending painting the hinges along with the cupboards but let me tell you why that is not a good idea. The paint on hinges and other hardware will start to chip very easily. Taking them out early will save you the arduous task of sanding the parts afterwards. You can simply put them back in place once you are done painting your cupboards.
Sanding the cabinet doors and drawers
Sanding is required so that the paint sticks to the cabinets. Keep on sanding until you notice that the glossy surface of your cupboards change to matte. Choosing the right sandpaper is also important so use one which is just enough to key the surface.
After you are done with sanding, take a damp cloth to wipe the surface. This will remove the dust from your cupboards.
Applying the primer or undercoat
A primer or undercoat acts as the base to your paint. An undercoat will help your paint remain smooth on the surface and help adhesion. There are paints which have these properties in them so they don’t require a primer and that may be mentioned on the tin. If you want to paint your cupboards with a strong colour paint, a primer will help you give it a better base. Leave the primer for 2-4 hours so it dries before you paint.
The universal primer is designed for all kinds of surfaces, such as wood, metal, melamine and UVPC, which will help adhesion and help get an even coat of paint. A single layer of this primer paint followed by GrafClean Midshine will give your kitchen a whole different look.
Start Painting:
Painting the kitchen drawers:
With the help of a paintbrush, roller or a spray gun, start applying the paint on your cupboards. While painting your drawers remember that you only need to paint the front of the drawers not the sides. The GrafClean MidShine is a paint safe for any kind of surface. The first coat of this paint will cover the surface but may not give a clean even finish. This coat is just to cover the porous area.
Why one coat is not enough
● Applying one coat will not give the solid colour that you want.
● It is not durable enough in case your wall gets dirty. Cleaning the wall will become very difficult.
● There are chances that you will miss some spots with one coat. The original colour of the paint won’t last long enough. Colour builds with coats
Why 2 coats are better
A double coating will last longer and will be more durable as compared to one coat. Kitchen cupboards are vulnerable to all types of heat and humidity and so the paint should be chosen very carefully. You need two coats to build up the colour and protection.
Painting the backs of the kitchen cupboards
Now paint the back side of your cupboards, turn them over to paint the other side the same way. Let the dry and toughen for a night before applying the second coat.
Fit the cupboards doors now they are painted
Now that the painting is behind you, time to put the cupboard doors back in their place and appreciate the finished look!
● Add new hinges to your cupboards to give them a brand new look or you could also use the ones that you took off.
● Attach the handles and drawer pulls on your cupboards and drawers respectively.
● An additional step would be to add protective bumpers on your kitchen cupboards and drawers.
The prepping time for painting your cupboards is the most important because that is where you set up your base The sanding and cleaning of cupboards followed by the primer and first coat of paint will take the most time. The second coat will take the least amount of time in the whole process. If this is one of those projects that you have been putting off for a long time then I hope this article gave you some motivation to begin!
How long does Graphenstone paint take to dry? – Example: Graphenstone Premium Interior Wall paint
- In conditions of 25 ºC and 60% relative humidity: 2-4 hours between layers and 24 hours drying.
- The work temperature (environment and support) must be between +5 °C and +40 °C.* Please check the individual product and data sheet for times specific to your choice of paint!
How to identify an eco friendly glue?
If you are trying to identify an friendly glue over a non friendly glue, then stick with us. We only offer natural, no toxic and safe glues, whether small tubes of natural contact adhesive or a huge tub of adhesive for floorings and other surfaces.
We would recommend this natural glue for most uses, but please double check the tech sheet or product page for more information and safety data. Any questions please just get in contact.
Eco friendly adhesives and natural adhesive options are a much better product to use than standard off the shelf glues, much better for you and the environment. There is no reason not to switch today, safer to have around the house and no more chemicals and nasties leaching out into the air you breathe! Buying non toxic glue helps the environment, as every tube you buy is one less nasty chemical glue that gets bought!
Can paint be recycled? If you want your eco paint to be recycled there is no better way than supporting your local community repaint scheme,
Community Repaint works with community organisations, local authorities, housing associations, manufacturers, retailers, businesses and many others to collect leftover, reusable paint and redistribute it into communities in need.
Our paint tins are recyclable, yes.
They are made using 80% recycled materials, and a fully recyclable themselves!
If you can find a use for them in your home or garage this is even better than recycling!
How do I paint furniture? Whether you’ve redecorated and discovered that a piece of furniture just doesn’t fit into the new colour scheme, or you’ve been struck by a sudden bolt of inspiration, painting furniture is a great way of stamping your personal style onto a space.
But how can you make sure you get the result you want? Today we’ll explain exactly how to naturally paint furniture, so you can let your creativity run free.
Choosing your natural paint
The first thing to do if you want to paint a piece of furniture is to decide on the colour and finish you want. If you’re after a semi matt finish, then we recommend Graphenstone Grafclean Mid Sheen natural wood paint, which is great if you’re after a classic, or an aged or distressed look.
The natural wood paint is available in many colours, or can be hand tinted to give you the exact shade you want, so whether you’re going for a classic white-painted look or something brighter and bolder, you’ll be able to use the natural paint you want.
Sanding and cleaning
Once you’ve chosen your paint, the next thing to do is prepare your piece of furniture. Use 150 grade sandpaper to abrade the surface. The aim here is not to smooth the surface of your furniture, but to slightly roughen it to give the paint a surface that it can bind to. You may be tempted to skip this step and go straight to the painting, but we recommend you take the time to sand as a properly-prepared surface results in far less paint chips, discolouration and peeling, and stays looking good for longer. We advise to sand back to bare wood as best you can, and then use the correct primer, in this case it’s generally the correct primer first
After you’ve sanded your furniture, it’s time to clean. It’s vitally important that you use the right cloth to clean with, as most cloths leave fibres behind which can cause the paint to lift and split later. Use a chamois-style lint-free cloth to make sure the surfaces are free of dust and grime. Do this right before you paint so there’s no chance for dirt to gather.
Priming
Priming, like sanding, is a phase that many people are tempted to skip. But, just as with sanding, there is a vital reason for this step. Applying a coat of special primer paint gives the top coat the perfect surface to bond to, and ensures that colours are vivid and consistent.
The Graphenstone primer makes a great primer paint, as it is designed to go on easily and leave an even coat while protecting the material beneath. If you want to get a perfect, blemish-free finish, we recommend using a foam mini roller to get a totally even look. If you’re after a more lived-in look, this doesn’t matter so much and you can get away with using an ordinary paintbrush. Whatever look you’re going for, you’ll need a small brush to ensure you get the primer into the hard-to-reach areas.
Painting
Once your primer coat is dry, use the sandpaper to smooth away any drips or lumps, and wipe the whole thing down with your cloth to make sure it’s clean before you apply the final coats. We recommend using at least two and usually three coats of paint to cover wooden furniture. Even though it may look fine after the first coat, furniture is more susceptible to wear than walls, so it’s a good idea to make sure that the topcoat is several layers thick. Please check the data sheet (on each product page) for suggested drying times,
Sand away drips between layers, and don’t be tempted to slather the paint on thickly. It’s better to build up your finish with several thin coats than to go for one thick one which risks peeling off. As with the primer, if you’re after a flawless finish, you simply have to use a mini roller, as brushstrokes are easily visible, especially with gloss paint.
Finishing
Once you’ve painted your piece of furniture, let it dry thoroughly, then give it a clean with your lint-free cloth.
So there you have it. If you’ve been worrying about the best way to paint your furniture, then hopefully this guide has given the confidence to let your creative spirit free. There are almost infinite possibilities to experiment with, including mixed colours and finishes. The only limit is your imagination.
Why not try a tester pot first and see if it’s right for you? Testers available for most paints!
How do I Paint a Ceiling? Painting a ceiling can be a real pain, but if you follow our instructions, you’ll find that with a little know how, it doesn’t have to be. This is how to paint a ceiling, the easy way.
WHAT YOU’LL NEED
Before you begin, you’ll need to make sure you have all the tools required to get the job done right. Here’s what you’ll need:
- A good quality paintbrush, about one and a half inches wide. Like this paintbrush
- A roller, preferably an extendable one long enough to reach the ceiling without causing you arm strain. Like this roller set
- A paint tray.
- Either a stepladder or, if you are worried about balance, a movable decorators’ platform. You can rent these from most tool hire shops.
- Masking tape.
- Clean cloths or rags.
- Biodegradable Dust sheets to cover carpets and furniture.
- Some Natural Paint! We recommend this range of natural paints, by far the best paint right now!
Read more below for how to paint a ceiling.
Step one: Preparation
Before you crack open the tin of paint, you’ll need to prepare your room and the ceiling surface. Start by removing furniture, or moving it to the centre of the room if there’s nowhere for it to go. You’ll need clear access to the edges of the ceiling, so make sure you leave enough room for your stepladder or platform. Once this is done, cover floors and furniture in dust sheets to prevent them getting spattered.
Next, you’ll need to clean the ceiling. Ceilings can become coated with a layer of oily grime over the years, and this can stop the new paint from bonding properly. Lightly scrub the ceiling with natural plant soap, and rub dry with a rag. A decorators’ platform makes this stage a lot easier, but it can be done with a stepladder. Just make sure you don’t overbalance. Remember, it’s always better to climb down the ladder and move it than to fall off, even if it seems tiresome.
Once your ceiling’s clean, it’s time to mask the edges. By applying masking tape to the top of the wall or architrave, you ensure a clean, straight edge. Be extra careful here, as any kinks in the tape can mean an uneven look later. If your room has ceiling features like a rose or skylight, mask the edges of these too.
Step two: Cutting in
Once the edges are masked, it’s time to open your can of paint. Use a flat head screwdriver to gently pry up the lid, being careful not to let it fall. Lay the lid down somewhere out of the way – the last thing you want to do is step on it and leave footprints all over the place.
Give the paint a stir, and dip in your paintbrush, ensuring you only wet the top half-inch of the bristles. Paint a three-inch border around the entire ceiling, making sure you paint right up to the masking tape, being careful not to splatter the wall.
If you have ceiling features like plaster roses or other decorative details, cut in around these too. Once you’ve completed a section, peel off the masking tape slowly before the paint dries to get that crisp, defined edge.
Step three: Rolling
Rolling a ceiling can be tiresome work, and very hard on your arms. If you’re working in a pair, you can swap back and forth between rolling and cutting in duties, but if you’re on your own you may want to think about getting an extendable roller. Because extendable rollers make the job easier on your arms and back, they make it a lot easier to paint a ceiling by yourself, and also cut down on the hassle of constantly moving the ladder.
Pour a little paint into your roller tray, just enough to fill the reservoir at the deeper end. Now, roll your roller over the paint, making sure you don’t submerge it. Remember, if you get wet paint on the roller arm, or anywhere except the soft absorbent rolling surface, it will drip and make a mess.
The best way to paint a ceiling with a roller is to work in three-foot-square patches, starting in a corner and working your way across the width of the room. Remember, moving a ladder is a lot less hassle than a trip to A&E, so if you’re using a stepladder don’t overstretch yourself. Pay attention to the joins between your patches, making sure you smooth each together before continuing.
Step four: Cleaning up
Once you’ve painted your ceiling it’s time to get things cleared away. Start by cleaning your brushes, roller and paint tray with a natural soap or detergent. When replacing the paint lid, make sure you press it firmly closed to avoid spillage.
Once the paint can’s closed and all wet brushes and rollers have been removed from the room, it’s time to remove the dust sheets and take a good look at your handywork.
How long does Auro Paint take to dry? A common question we hear all the time!
Well, it’s a variable one, but fundamentally they all take longer than your standard off the shelf petrochemical paints. The reason that they take a while longer than normal paints is that they are , and they don’t contain the nasty solvents and quick drying chemicals that speed up the process, to the detriment of the people living in the house.
It’s a small price to pay, just allow a few more hours of drying time in exchange for no more nasty chemicals leeching into you air! A wise trade off.
Each product page has a downloadable tech sheet and will give you the exact drying time of the specific paint, but the generally the glossy paints need about 24 hours between that, and the emulsions are much quicker. The Auro 524 is one of the newest recipe and has been designed to dry much much quicker.
For a list of all the natural paints we recommend have a look here: NATURAL WALL PAINTS
Where can I find Breathable paint suppliers in the UK? When water vapours are allowed to permeate through a paint, it is considered breathable. Breathable paints have a high rate of permeability which means they allow water to quickly evaporate. It’s almost like having your own dehumidifying system built right into the walls! When moisture is allowed to build up, it can quickly cause deterioration in your home. Trapped water can lead to rotting, mould, peeling, warping and many other such destructions.
Read more about breathable paints here.
So where can you find breathable paint suppliers in the UK? Though manufacturers may be few and far between, the top trusted supplier of natural, organic and breathable paints is The Organic and Natural Paint Company. This UK based distributor carries the full line of Natural Paints as well as eco friendly varnishes, cleaning supplies, adhesives and much more.
Breathable paint comes in different types including highly specialised and useful formulas such as Anti-Mould Paint. This excellent lime-based product helps naturally prevent mould and is very breathable, thus making it ideal for damp areas such as bathrooms and kitchens.
Chalk based paints such as natural Chalk Paint are also super breathable. They also have the added bonus of being great odour absorbers. Because they are mineral based and solvent free, they contain no VOCs (Volatile Organic Compounds) which makes them perfectly safe for indoor use. You can even find breathable natural emulsions like the Eco Friendly Natural Emulsion Paint, so there’s really no reason not to switch to a breathable paint.
Once you’re ready to give your home and your family a breath of fresh air, be sure to take a look at the best of breathable paint suppliers in the UK, The Organic and Natural Paint Company!
More breathable paint resources:
What is Wall Breathability, and how does breathable paint help?
Breathable Plaster – Breathaplaster Natural Lime Plastering
Buy Breathable Paints currently for sale in the UK
Glossary of raw ingredients in the Auro Paint range
AURO PAINT Raw Materials Guide
Binders, resins, oils, waxes, fats, soaps:
Beeswax: Pure, unbleached, ductile beeswax from best provenances, certified low residue level. Germany.
Beeswax(-ammonia) soap: Beeswax is saponified with liquid ammonia in dedicated boilers. It serves as a natural wetting agent in pigments.
Carnauba wax: Hard, water-repellent wax obtained from a Brazilian palm tree species. The leaves of these tall palm trees are cut (they constantly grow again), the wax is liquefied by boiling in water, skimmed off the top and cleaned physically (with bleaching earths). Thanks to its particular hardness, this wax enhances the mechanical resistance of all soft waxes. South America.
Colophony glycerol ester: Natural resin colophony is modified with the fat glycerin in a boiling process on the basis of a special method. The result is a binder with very good weather resistance and elasticity. Europe.
Dammar: One of the most valuable and beautiful vegetable resins on earth. Its name is derived from the Malaysian word for “cat eye”. It is very light-coloured and low in yellowing. Its tree of origin on Sumatra also supplies Meranti wood. The cultivation of dammar resin enables the inhabitants of Sumatra to sustainably use the tropic forest without destroying it. The use of dammar thus actively combats the depletion of tropical forests. Asia.
Wood oil – stand oil: Oil boiled until thick originating from the nut of the Chinese Tung tree; a valuable, easily drying lacquer binder. Asia.
Potassium silicate: Finely dispersed solution of silicates in water which is produced by smelting quartz sand and potash. Used as binder for silicate paints and plaster. Germany.
Lime colophony: Made from melted colophony resin whose natural acid content is neutralised by adding quick lime. Germany.
Coconut fat potassium soap: Fat from the seeds of coconut palm trees gently saponified with caustic potash solution in dedicated facilities. South America.
Larch resin balsam: An ethereal balsam resin produced by drilling into the larch tree trunks; colourless, smells of terpene and serves as scent and binder. Europe.
Linseed oil: Fatty seed oil of the linseed plant (Linum usitatissimum), produced by cold and warm pressing fol- lowed by gentle desliming and physical discolouring (without chemical bleaching agents). Valuable binder component which provides high elasticity and creep; partly from regional, improved conventional and ecological cultivation. Germany.
Linseed fatty acid: Fatty acid produced naturally from linseed oil by the separation of glycerin (see glycerin) which helps to wet pigments. Germany.
Linseed potassium soap: Nurturing cleaning agent produced from pure linseed oil by saponification with caustic potash solution or potash, slightly water soluble, very easily biodegradable. Germany.
Linseed oil – stand oil: Valuable binder for lacquers, stains and wall paints produced by boiling of linseed oil until thick. The respective boiling time is decisive for the different viscosities. Germany.
Natural rubber latex: Chyle produced by cutting through the bark of rubber trees cultivated in South East Asia; a highly concentrated natural dispersion of natural rubber (caoutchouc) in water. An indispensable binder mainly used in adhesives. Contains a little liquid ammonia to prevent flocculation during transport. Asia.
Sodium palm kernelate potassium soap: Fat made from the crushed seeds of oil palms (not to be mixed up with palm oil generated from pulp) gently saponified with caustic potash solution in dedicated facilities. The soap has very good wash properties. South America.
Rape oil potassium soap: Oil from the seeds of Brassica napus, also referred to as turnip rape, gently saponified with caustic potash solution in dedicated facilities. Small amounts of soap are used to synergistically improve the wash performance of other plant soaps.
Castor stand oil: Valuable, dryable binder made from rici- nus oil, i.e. oil from the seeds of the subtropical Ricinus shrub by means of dehydration (elimination of water).
Ricinus oil potassium soap: Oil from the seeds of the sub- tropical Ricinus shrubs (Ricinus communis) gently saponified with caustic potash solution in dedicated facilities. The soap has a minor wash performance but excellent properties for natural foam regulation.
Safflower stand oil: Drying oil made from the fatty seed oil of the Safflower thistle, thickened by boiling to form a low- yellowing binder. Europe.
Shellac: Resinous substance produced by lac insects (Laccifer lacca) living on trees domiciled in India. The resin encrustations are removed from the tree branches, filtered hot through cloths and bleached – not chemically but purely physically by AURO. Elastic binder for quick-drying lacquers. Asia.
Shellac (ammonia soap): Water-dilutable dispersion made by means of saponification with ammonia liquid in dedicated facilities, used as binder e.g. in vegetable paints.
Soy bean oil potassium soap: Oil from soy beans gently saponified with caustic potash solution in dedicated facilities.
Sunflower oil: A light yellow, fatty oil from sunflower seeds which is used in lacquers, paints and soaps. Germany.
Sunflower oil potassium soap: Oil made from the seeds of the central European sunflower (Helianthus annuus) gen- tly saponified with caustic potash solution in dedicated fa- cilities. This soap has an excellent wash performance and is the most important plant soap in most AWALAN prod- ucts. AURO only uses sunflower oil from ecological culti- vation.
Walnut oil: Fatty seed oil from the pulp of the Juglans regia; very valuable, semi-drying binder for artist paints. Germany.
Mineral pigments and fillers:
Aluminium silicate: Aqueous alumina naturally formed by weathering of rock rich in aluminium or fine, mineral filler with pigment properties produced by technical precipitation. Europe.
Wood cellulose: Organic filler based on cellular fibres made from deciduous wood or beech wood without using chlorine bleach. Provides wall paints and plaster with mechanical strength and a resorption capacity similar to that of wood. Germany.
Chromoxide green: Green mineral pigment made from chromium ores. Its production has negative environmental impacts but there is no alternative yet. In contrast to so- called chromium (VI) compounds, it is insoluble and there- fore non toxic. Germany.
Earth and mineral pigments: extremely finely dispersed, highly transparent pigments with excellent UV protection and good weather resistance which are especially used in stains. Europe.
Iron oxide pigments, transparent: Inorganic pigments like natural earth paints, synthetic iron oxide pigments, e.g. ochre, English red, Persian red, earth black, and selected mineral paints such as ultramarine and chromium green. Europe.
Calcite (marble powder): Natural appearance of calcium carbonate (like chalk). Available from most finely ground to coarse grain size. Filler for lacquers, wall paints, plaster and adhesives. Europe.
Kaolin: Natural clay mineral (china clay, an alumina sili- cate). Filler for wall paints, plaster, lacquers. Base compo- nent for chinaware. Europe.
Catalytically effective pigments: Inorganic pigments with a special, finely dispersed structure. Capable of splitting up and degrading organic components, including harmful substances, under UV impact.
Chalk: Natural calcium carbonate from best sites, e.g. Hildesheim Börde, finely ground and elutriated, therefore high whitening power and grain fineness. Germany.
Quartz sand: Crystalline silicic acid, silicium dioxide, one of the most frequent minerals of the earth’s crust. A chem- ically very hardwearing material which forms during the weathering process of eruptive rock. Virtually unlimited availability. Germany.
Talcum: Natural silicate mineral with pronounced layer structure (“steatite”). Thixotropic and pigment-saving filler for paints and lacquers. Europe.
Titanium dioxide: Very opaque, non toxic white pigment for paints and lacquers. Made from natural minerals (e.g. rutile) by separation of coloured companion substances. AURO has always used this pigment from sulphate proce- dures with weak acid recycling and recovery of green malts, without dumping of weak acids and without chlo- rine chemistry. Germany.
Ultramarine: An inorganic pigment whose crystalline struc- ture is similar to that of lazurite. Used as mineral pigment in all blue stains and lacquers. Europe.
Auxiliaries:
Alaun: A white, crystallised powder made from potassium and aluminium sulphate used in the manufacture of veg- etable paints. Germany.
Amine soaps: Ammonium compounds modified by organic components. Facilitate the integration of binders into water-based products. Europe.
Bentone: A natural clay mineral, swelling clay, which is used as gelling and thixotropic agent in gloss paints and printing inks, waxes, putties, adhesives but also for cos- metic products. Europe.
Borax: Natural mineral from specific salt lakes; traditional, mild alkali used for pulping e.g. of casein. North America.
Boric acid: Weak mineral acid formerly made from Tuscan spring water, today produced from borax with sulphuric acid. Europe.
Boric salt (sodium octaborate): Natural mineral from salt lakes. Very effective, non volatile, non fumigating agent for preventive biological wood and flame protection. North America.
Cellulose ether, ester: Expanding agents made from wood cellulose by chemical pulping. Serve as simple adhesives in AURO Wallpaper paste and distemper, but also used as emulsifiers and thickening agents in paints and adhesives for better processing control. Europe.
Citrate: Sodium or potassium salt of citric acid. Germany
Citric acid: Natural fruit acid in citrus fruits with good lime dissolving and water softening effect; made from molasse by means of fermentation. Germany.
Green vitriol: Found as mineral in the form of green or white encrustations; technically produced by dissolving iron in sulphuric acid. This raw material is used for wood preservation, plant dyeing and in tanneries. Europe.
Gypsum: Natural gypsum, calcium sulphate, from deposits in the Harz region. Germany
Sodium sulphate: Salt made from sodium sulphite and sulphuric acid, used in vegetable paints and detergents. Germany.
Glycerin: Polyvalent alcohol. Component of all animal and vegetable fats, produced by separation of fatty acids. AURO only uses glycerin of purely vegetable origin. Ger- many.
Gum arabicum: Dried mucilage from different species of acacia, also called acacia rubber. This rubber is colourless to brown and odourless. Dissolved in warm water, it forms a ductile, gluey liquid used in adhesives and as thickening agent. Europe.
Salts of hartshorn: In chemistry referred to as ammonium carbonate, used as lead additive in vegetable paints. Ger- many.
Caustic potash: Strong alkali for the saponification of vegetable oils and fats to generate wash active sub- stances. Made from potassium chloride and water by electrolysis. Germany.
Camomile extract: Produced from camomile by alcohol extraction, protects the skin. Germany.
Silicic acid: Finely dispersed silicic acids without crys- talline (quartz) structure made from quartz sand and lime by flame hydrolysis. Used as matting filler or as fil- ter agent and binder additive in silicic brines. Germany.
Cork: Dermal tissue formed by almost any green plant on its subterranean and superterranean parts. Only the very thick cork layer of the cork oak (Quercus suber) domiciled in Mediterranean countries is of economic use. Europe.
Cork powder, granulated cork: Coarsely to finely ground cork. Germany.
Lecithin: Natural phospholipid made from soy beans by hot water extraction which promotes wetting and emulsification. Germany.
Lactic acid: Acid produced by the fermentation of sugar by means of lactic acid bacteria. Prevents lime stains on crockery. Germany.
Lactic casein: Flocculated milk protein made from cow’s milk by acidification after separating the fat. Valuable binder and emulsifier used in paints and adhesives. For this purpose it is pulped with mild alkalines (borax) to form casein paste. Germany.
Sodium metasilicate: Alkaline, water-dilutable sodium salt of silicic acid. Has a fat-dissolving effect in dish- washing detergents due to its alkalinity and is also water softening and anticorrosive. Germany.
Sodium percarbonate: An adduct of chlorine-fee bleaching agent hydrogen peroxide to sodium carbon- ate. Decomposes into sodium carbonate, water and ac- tive oxygen at higher temperatures. The latter has a bleaching effect on stains. Free of boron. Germany.
Natron: In chemistry referred to as natrium hydrogen carbonate, used as neutralising agent and retarder in paints. Germany.
Organic acids: Carbon compounds with slightly acidic properties (as opposed to known mineral acids such as sulphuric acid). In combination with AURO binders based on vegetable resins and oils, organic acids im- prove the application-related properties of coating ma- terials. Germany.
Potash: Mild alkali formerly lixiviated from potash, today produced by the conversion of sodium carbon- ate with potash soaps. Used for the saponification of vegetable waxes, resins and oils. Germany.
Swelling clay: Natural mineral (phyllosilicate) with good swelling capacity. Used as thixotropic agent in aqueous and resinous oily products with good swelling capacity and dirt absorption capacity following surface treatment. Germany.
Rape, ricinus oil tensides, emulsifiers:
Specifically se- lected auxiliaries based on vegetable oil,
chemically modified, for the in-house production of aqueous, solvent-free oil resin binder for AURO Aqua products. Germany.
Ox bile: Thanks to its high content in bile acids, lecithins and enzymes, recommended as concentrate for local stain removal which is gentle on fibres. Ger- many.
Liquid ammonia: Alkaline solution of ammonia in water, used for making special, water-dilutable resin, wax and oil soaps, so-called ammonia soaps. Germany
Phyllosilicate: A mineral similar to swelling clay but produced by precipitation. The silicate particles are po- sitioned in sheets. Phyllosilicate has a high binding ca- pacity for calcium and is thus the main ingredient of our softener component. Germany.
Evaporated salt: Undenaturated, pure rock salt (sodium chloride) without free flow agents for the prevention of scale deposits in dishwashers. Germany.
Sodium carbonate: Mild alkali from special salt de- posits (sodium carbonate lakes). Sodium salt of car- bonic acid, sodium carbonate which is used in AURO powder products for the pulping of casein. Germany.
Stearates: Oil and fat components insulated from these, used for making soaps and as auxiliaries in paints. Germany.
Stearic acid: Found in large quantities in fats and oils, produced from these by fat separation. Used for mak- ing stereates and as auxiliary in paints.
Traganth: Vegetable paste for artist paints, generated by cutting the stalk of the Astragalus gummifer domi- ciled in Turkey. Europe.
Drying agents (lead-free): Auxiliaries, metal soaps made from minerals of calcium, cobalt, zirconium or manganese for reducing the drying times of vegetable oils. Germany.
Turkey red oil: Ricinus oil sulphatised by conversion with sulphuric acid, used as auxiliary emulsifier. Ger- many.
Wine vinegar: Natural acid made from wine by means of conversion into alcohol and further fermentation to produce vinegar.
White lime hydrate: Slaked lime (aged slake lime) in powder form. Produced by the baking of chalk followed by hydration. Already used as binder for lime mortar and lime paints in the ancient world. Germany.
Wheat flour: Pure grain flour, used as thickening agent in paint removers. Germany.
Xanthan rubber: Highly molecular, natural catabolic product, polysaccharide of (the genetically unmanipu- lated!) bacterium Xanthomonas campestris. Suitable as thickening agent and binder. Germany.
Zeolite: Aluminium silicate produced from alaun and sodium silicate by precipitation, a particularly environ- mentally friendly phosphate substitute for softening water. Germany.
Sugar tenside: Wash active substance, made from sug- ary raw materials by means of conversion with veg- etable oils using potash at temperatures below 100 °C. Germany.
Vegetable paints:
Logwood extract: Produced from the heartwood of trees cultivated in plantations, used for dyeing, its colour range covers blue and violet black shades. Europe.
Catechu: Thickened juice extract from the heartwood of the Indian Acacia catechu. Catechu is used in brown to black vegetable paints. Asia.
Chlorophyll: Pigment made from the dye of leaf green. The green dyestuff from plant leaves is used as copper complex in vegetable paints. Germany.
Cochenille: Red colorant produced by scale insects which live on cactuses domiciled on the Canary Isles and in Mexico. It gives vegetable paint pigments a slightly bluish red colour shade. This raw material has a red to violet dyeing effect and is used as food colour- ing. Europe, North America.
Indigo: Extract produced by fermentation of the Bengal indigo plant Indigofera tinctoria. Was already used as dye 4,000 years ago. Serves as blue vegetable paint pigment. Asia.
Madder roots: Colorant with a high content in red dye from central Europe, Turkey and Iran which is used in red vegetable paint pigments for wall stains. Europe.
Vegetable paint alumina pigment: Coloured pigments for artist and wall paints made on the basis of a dedi- cated method. The colorants (Reseda, Madder, Indigo, Cochineal, Leaf Green, Catechu, Logwood, etc.) are ex- tracted with water adding alaun, the pigment is then precipitated as alumina coloured lacquer with lyes, fil- tered and washed. A laborious process which provides harmonically bright colour shades which sometimes take many days to develop.
Reseda: Dye plant (Reseda luteola, Wau) for making yellow vegetable paint pigment. Europe.
Solvents, ethereal oils:
Alcohol: Produced by the fermentation of starch con- taining vegetables, e.g. potatoes, followed by distilla- tion. AURO only uses non denatured alcohol for shellacs. Germany.
Cembra oil: A water light oil of the Swiss pine, also re- ferred to as Swiss stone pine oil, with strong but flavoursome odour. Protects from textile moths and other insects. Europe.
Bergamot oil: Pure ethereal, yellowish oil from the fruit skin of the Bergamot tree (Citris bergamia), used as scent. Europe.
Eucalyptus oil: Ethereal oil with slightly preserving ef- fect made from the leaves of the Australian Eucalyptus tree, produced by water vapour distillation. Europe.
Pine terpene alcohol: High-boiling fractions from the distillation of pine balsam terpene oil following cat- alytic water addition. Europe.
Lavender oil: Water vapour distilled oil of the lavender plant (Lavandula officinalis) domiciled in Mediter- ranean countries. Europe.
Lemongrass terpenes: Distillate from the ethereal oil of the tropical grass Andropogon flexuosus domiciled in East India. Asia.
Orange oil: Ethereal oil produced during the manufac- ture of orange juice. The distilled, highly fragrant com- ponents are used in the perfume industry and for aroma therapy. The “terpene lyes” of weaker fragrance are used as solvents in resins and oils. South America.
Rosemary oil: Ethereal oil produced from the leaves of real rosemary by water vapour distillation. The oil has mildly fungicidal and preserving properties. Europe.
Water: AURO uses particularly soft, pure drinking water from the nearley Harz mountains. Germany.
We declare all raw materials contained in our products. Please see www.auro.com for more information about our concept of “gentle chemistry”.